1000 grit car scratches—those faint yet noticeable marks left by fine sandpaper, light debris, or minor abrasions—may seem tricky to fix, but with the right 135ml scratch repair solution and technique, you can restore your vehicle’s paint to a smooth, glossy finish. Unlike deeper scratches that require professional intervention, 1000 grit marks only affect the clear coat, making them perfect for a DIY repair. Below is a step-by-step guide to get the job done right.
What You’ll Need
-
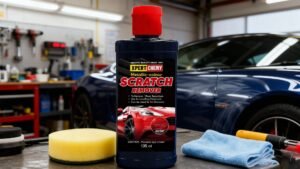
135ml car scratch repair solution (formulated for clear coat restoration)
-
Soft microfiber polishing pad (or dual-action polisher for larger areas)
-
Car wash soap and microfiber towels (for pre-cleaning)
-
Isopropyl alcohol (to remove residue)
-
Lint-free cloths
-
Masking tape (to protect trim, badges, or non-paint surfaces)
Step 1: Prep the Scratched Area
Start by thoroughly cleaning the area around the scratch. Dirt, wax, or debris can interfere with the repair solution’s adhesion and cause more scratches during polishing. Mix car wash soap with water, gently scrub the area with a microfiber towel, then rinse and dry completely. Next, use a lint-free cloth dampened with isopropyl alcohol to wipe the scratch—this removes any remaining wax or oils. For precision, apply masking tape along the edges of the scratch to protect surrounding paint and trim.
Step 2: Apply the 135ml Repair Solution
Shake the 135ml repair solution bottle vigorously for 30 seconds to ensure the formula is well-mixed. Squeeze a small amount (about the size of a pea) onto the soft polishing pad—you don’t need much, as the solution is concentrated. For hand application, fold the pad around your finger to focus pressure on the scratch. For larger areas, attach the pad to a dual-action polisher set to a low speed (1500–2000 RPM).
Step 3: Polish the Scratch in Circular Motions
Press the pad lightly against the scratch and work in small, overlapping circular motions. Maintain consistent pressure—too much force can damage the clear coat, while too little won’t activate the solution. Polish for 30–60 seconds per scratch, then pause to wipe away excess solution with a clean microfiber towel. Check if the scratch has faded; if it’s still visible, apply a tiny bit more solution and repeat the process for another 30 seconds. Most 1000 grit scratches will disappear after 1–2 rounds of polishing.
Step 4: Remove Residue and Inspect
Once the scratch is no longer visible, use a clean, damp microfiber towel to wipe away all remaining repair solution. Inspect the area under good lighting—hold the towel at a 45-degree angle to check for any faint marks. If needed, do a final light polish with a dry microfiber pad to blend the repaired area with the rest of the paint.
Step 5: Protect the Restored Finish
After the repair is complete, let the area dry for 1–2 hours. To seal the results and prevent future scratches, apply a thin layer of car wax or sealant. This adds a protective barrier and enhances the gloss, making your vehicle’s paint look as good as new.
Key Tips for Success
-
Test the repair solution on an inconspicuous area (like the inside of a door jamb) first to ensure it doesn’t discolor your paint.
-
Don’t rush the polishing process—slow, consistent motions yield the best results.
-
The 135ml bottle is enough for 15–20 small scratches or 5–8 larger areas, so store it in a cool, dry place after use to preserve its effectiveness.
-
Avoid using the solution in direct sunlight or extreme temperatures, as this can cause the formula to dry too quickly.
With this simple 5-step method, your 135ml scratch repair solution turns 1000 grit car scratches from an eyesore into a distant memory. The process is affordable, takes less than 30 minutes, and delivers professional-quality results—no trip to the body shop required. Just remember: patience and proper prep are the keys to a flawless finish!